![]()
![]()
![]()
![]()
Replacing the flap door in Nikon Super Coolscan LS-8000 and LS-9000 scanners
The flap door (I think intended mostly to keep the dust out, but may be it also helps with reducing the amount of outside stray light inside the scanner) is one of very few weak links in the Nikon LS-8000 and LS-9000 scanners. I had seen many broken.
There are two failure modes associated with broken flap door:
- The thumb view scan (under Nikon Scan) fails (scanner makes whining noise and has to be shut down).
- Scanner fails to scan last frame on the film tray.
There is an optical interruptor sensing if the flap door had closed (which should happen when the last frame had been previewed or scanned). If that does not happen - scanner will report hardware error and stall.
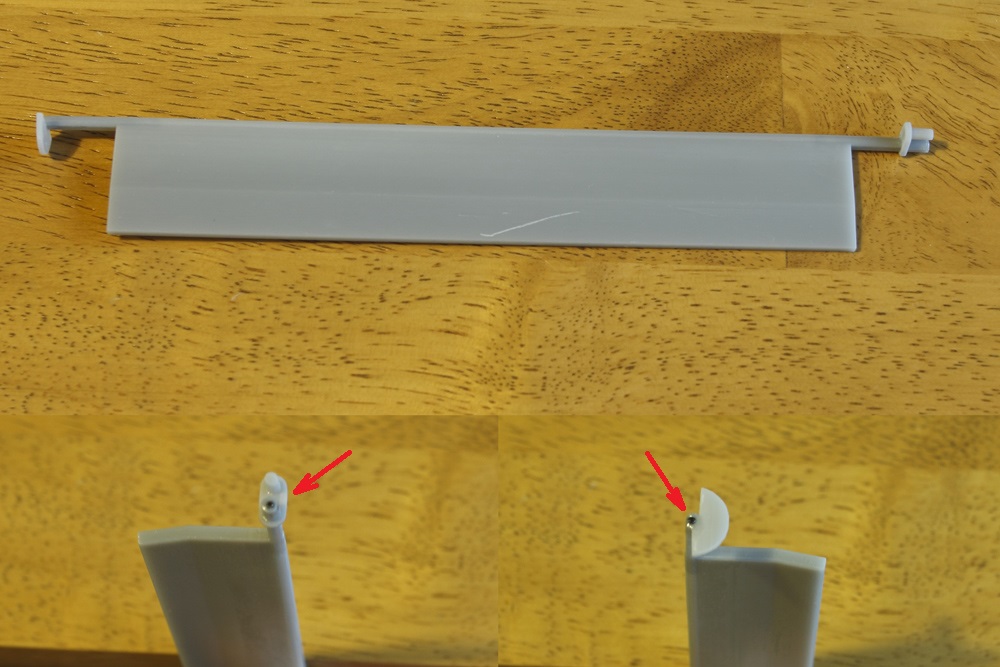
These doors are made from ABS and they often break at the point where the flap is connected to the small shafts. I had repaired few of them by carefully drilling small holes along the central axis and putting steel pins inside. I had also made a 3D model of the door and had it printed on 3D printer, see below. I had designed it with a hollow center, and then glued in 20mm long steel pins (black, with red arrows pointing to them in the photo below) to reinforce the weak points of the original design.
1) To repair or replace the broken flap door, first follow the first 3 steps of
Disassembly of Nikon Super Coolscan LS-8000
or first 4 steps of
Disassembly of Nikon Super Coolscan LS-9000
- to remove the outer shell and the front panel.

2) Remove the two screws (indicated by red arrows above one is not visible in the photo above) and take off the small PCB holding the tray eject button switch.
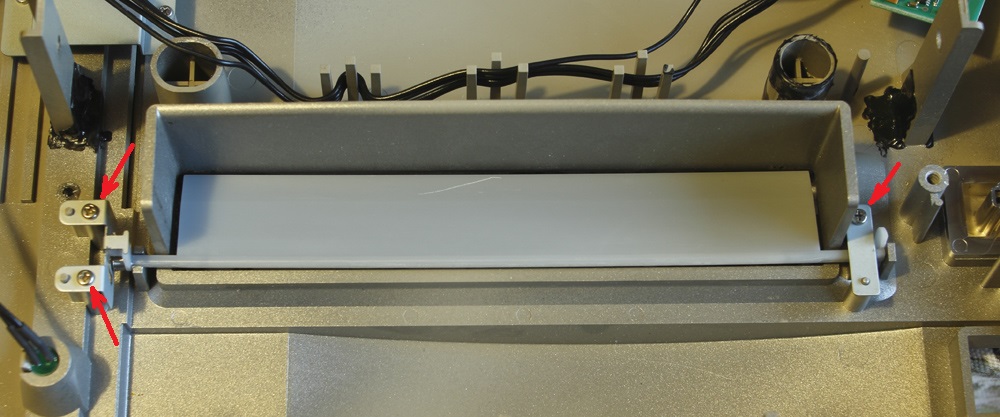
3) Remove the three small screws (indicated by red arrows above) and take out the broken flap door (the image above is with the replaced door :).
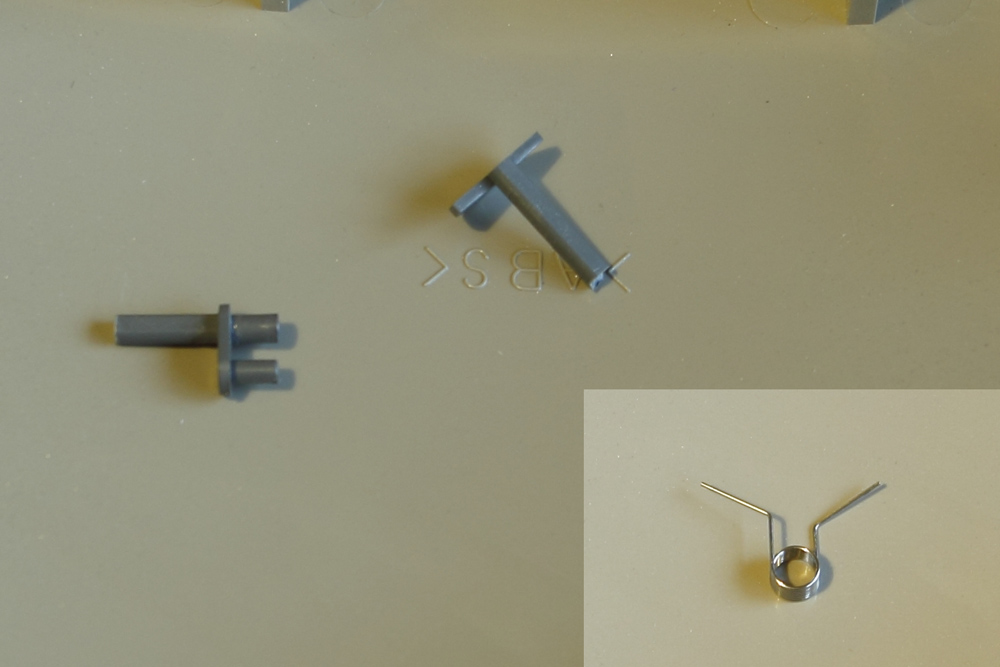
4) Shown above are little parts that typically break off in this door and a torsion spring that helps to keep the door closed (flap vertical).
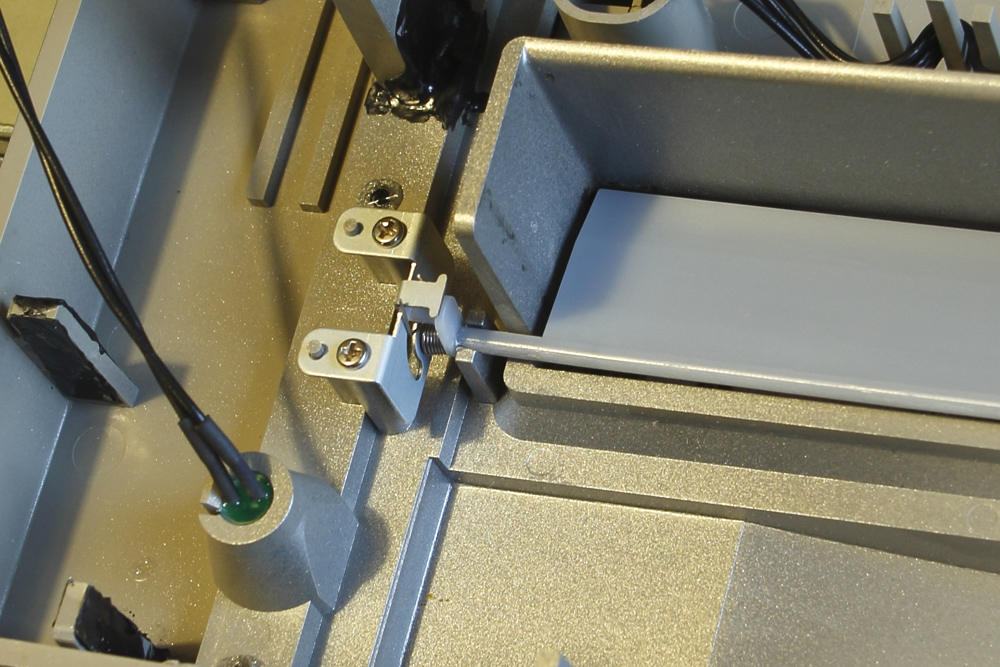
5) Put a replacement (repaired) door back in place. Make sure you insert the torsion spring in correctly (see below).
6) Then reassemble the scanner.