![]()
![]()
![]()
![]()
Nikon Super Coolscan LS-8000 disassembly procedure.
1) Remove film trays, power the scanner down, unplug the power & Firewire cables. Set the scanner on a clean surface.
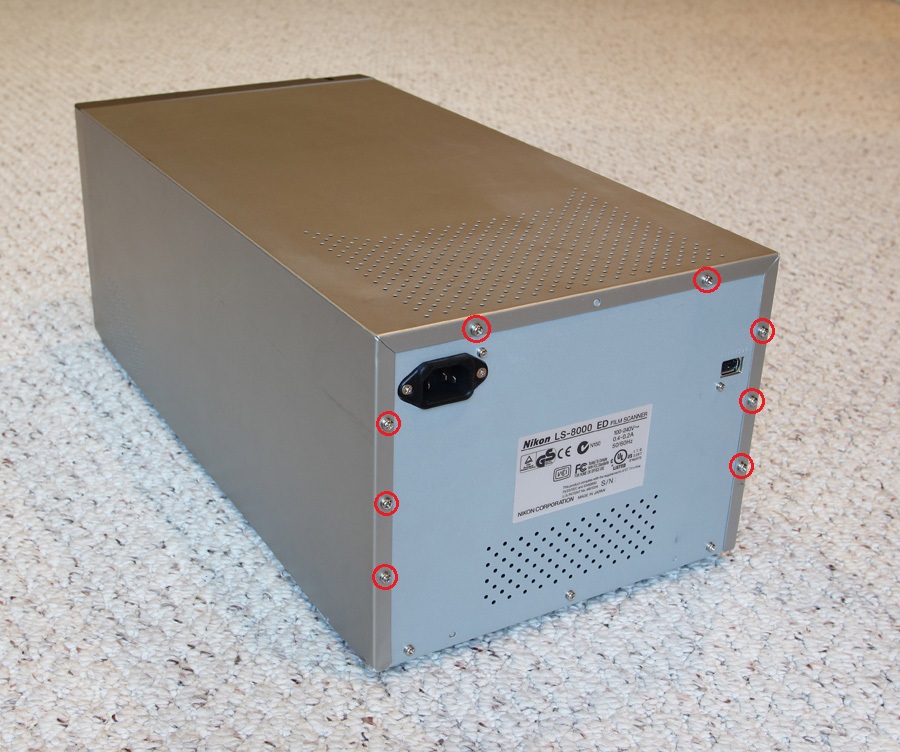
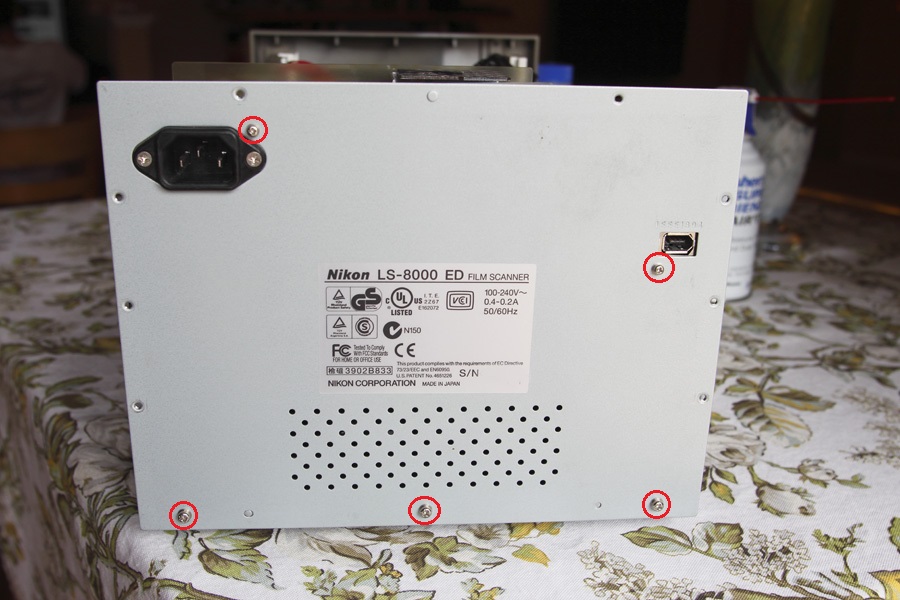
2) Remove these 6 screws on the back of the unit and slide the metal shell off.
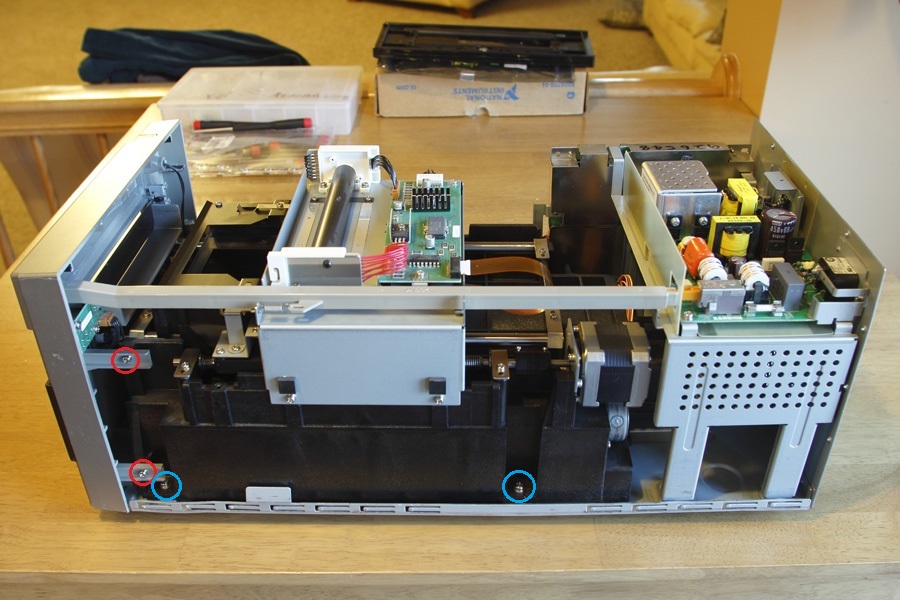
3) Remove the 2 screws (holding the front panel) indicated by red circles. Also remove 2 more screws (holding down the optical assembly) indicated by blue circles.
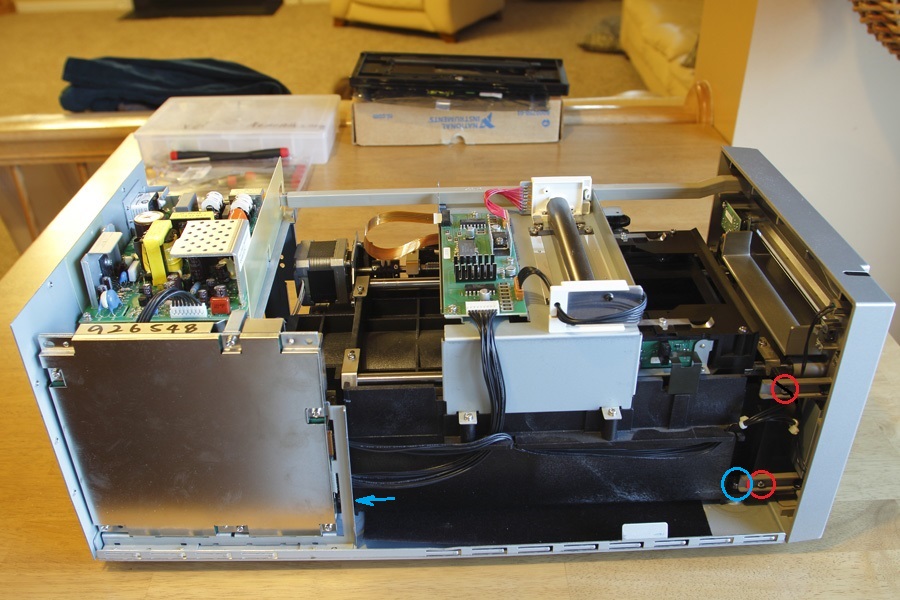
3) Turn the scanner around and remove 2 more screws (holding the front panel) indicated by red circles. Also remove 2 more screws (holding down the optical assembly) indicated by blue circle and blue arrow (hiding behind metal bracket in this picture).
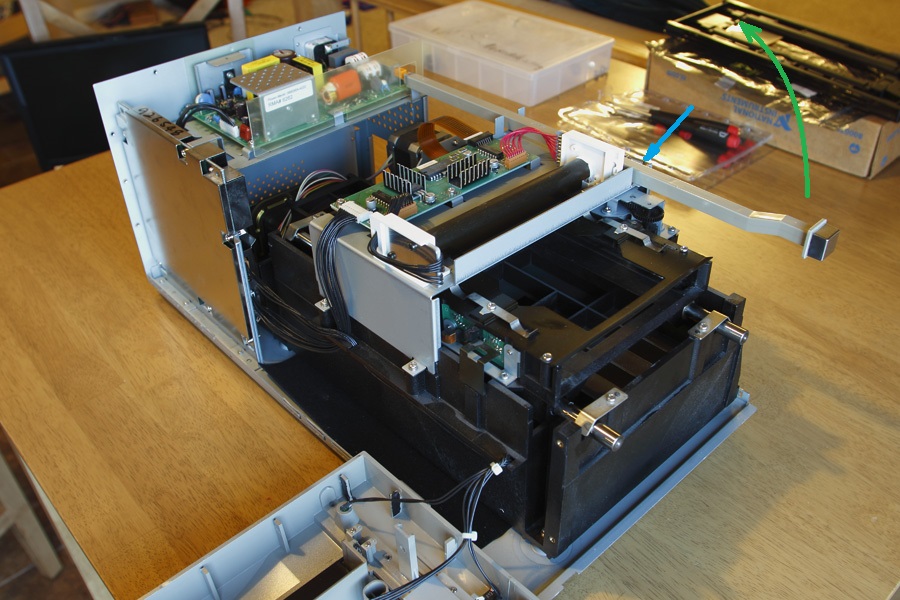
4) Push the power button - this will move the power lever in by a few millimeters. Remove the front panel. Disconnect the spring at the point indicated by the blue arrow. Lift the power button lever as indicated by the green arrow and disconnect it from the power switch. (It is important that the switch is in ON position - otherwise it is hard to disconnect the lever from it).
5) Remove the 5 screws holding the back panel.
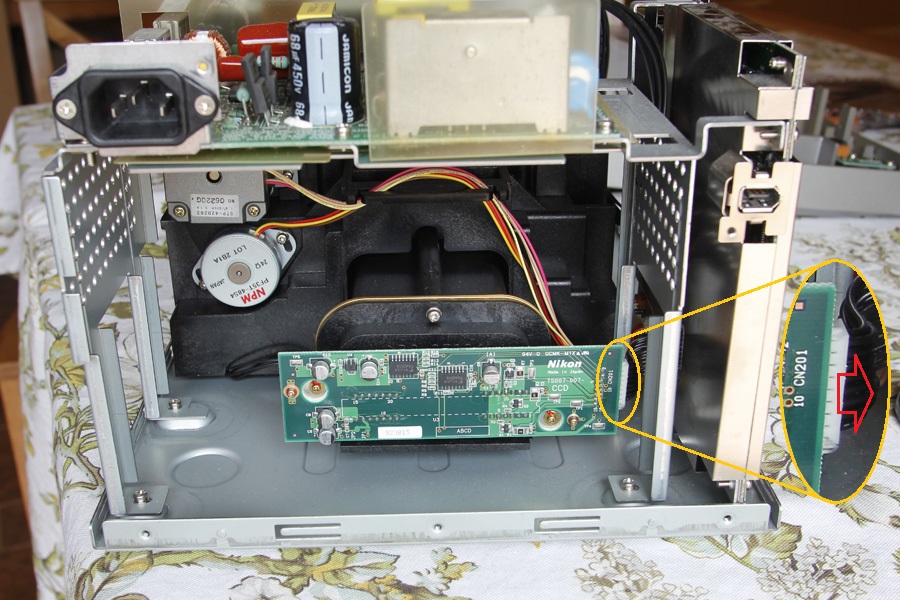
6) Disconnect the cable to the scan head (pull the cable gently in the direction indicated by the red arrow).
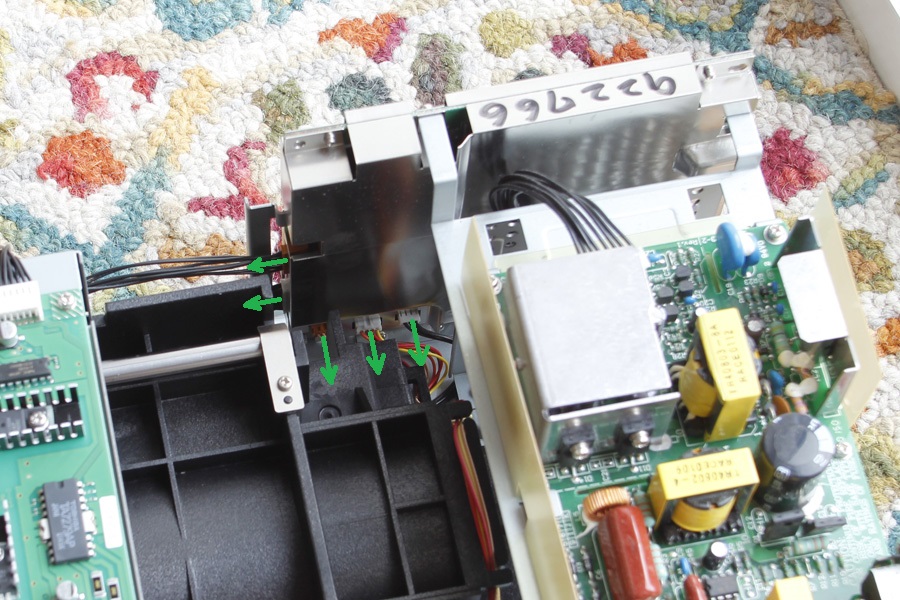
7) Disconnect (gently wiggle to pull out) five connectors in the directions indicated by the green arrows. It may be easier if you slide the optical assembly a little bit.
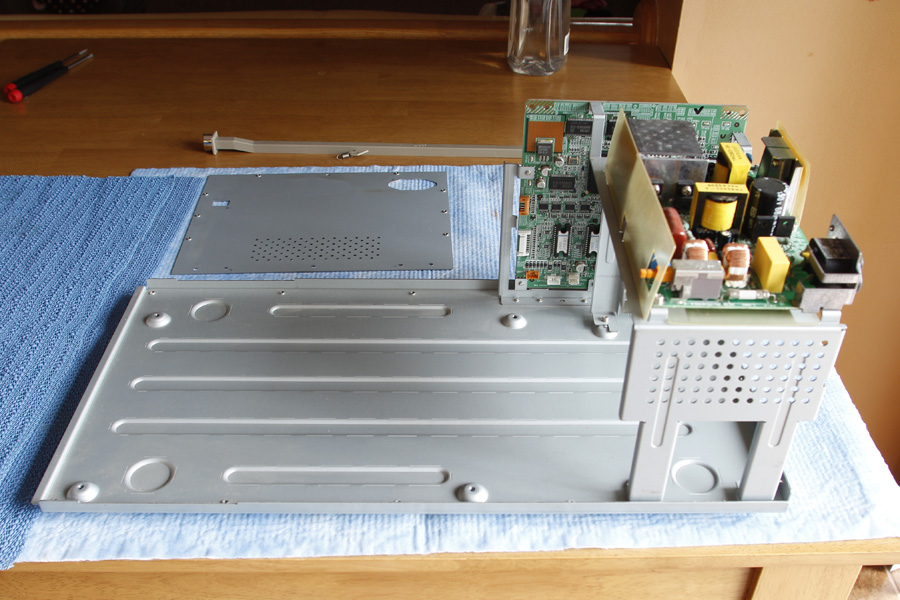
8) Remove the optical assembly. At this point you may consider attaching some black material (black flock mod). John Acton proposed this in order to reduce the scattered light near optical sensor.
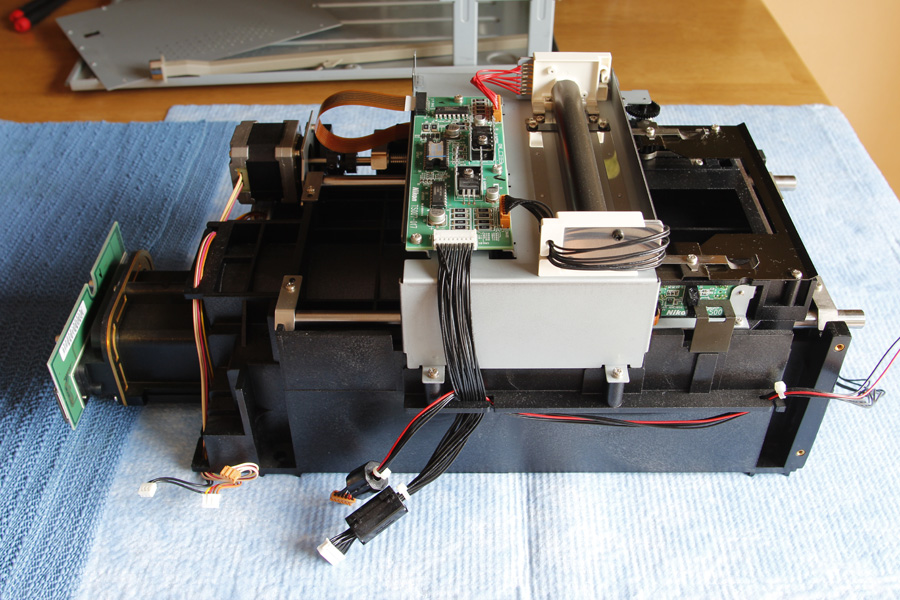
9) Place optical assembly on a clean area. You can now perform mirror cleaning procedure or lubricate rods, ets..