![]()
![]()
![]()
![]()
Cleaning the mirror in Nikon Super Coolscan LS-8000 and LS-9000 scanners
Nikon LS-8000 and LS-9000 scanners are, in my opinion, very well built and are extremely reliable. Still some maintenance is desirable to make sure the scan image quality remains high. In particular, there is one optical component, a mirror, that is more likely (than other components) to accumulate some dust. I think it is worthy checking the mirror cleanliness if your scanner was stored in a dusty environment, or used extensively (over 10,000 scans), or if you purchased your scanner used and the seller did not clean the mirror prior to sale.
A dirty mirror in the scan head will result in degraded scan image quality. In extreme case the scanner will stop working - it will report a hardware failure because the light-source self-test will fail. Another symptom - sometimes the scanner may report failure to perform autofocus. These all may be caused by failing LED, but more likely it is just a dusty/dirty mirror.
The procedure is relatively straightforward and is outline below.
I think any person with reasonable manual dexterity and few simple tools can do it but I cannot assume any responsibility for any damage that can be done to the scanner. You are welcome to follow my procedure, but YOU ARE DOING THIS AT YOUR OWN RISK!
First perform disassembly steps of Nikon Coolscan LS-8000 or LS-9000

1) Position the optical scanning assembly on a clean area.

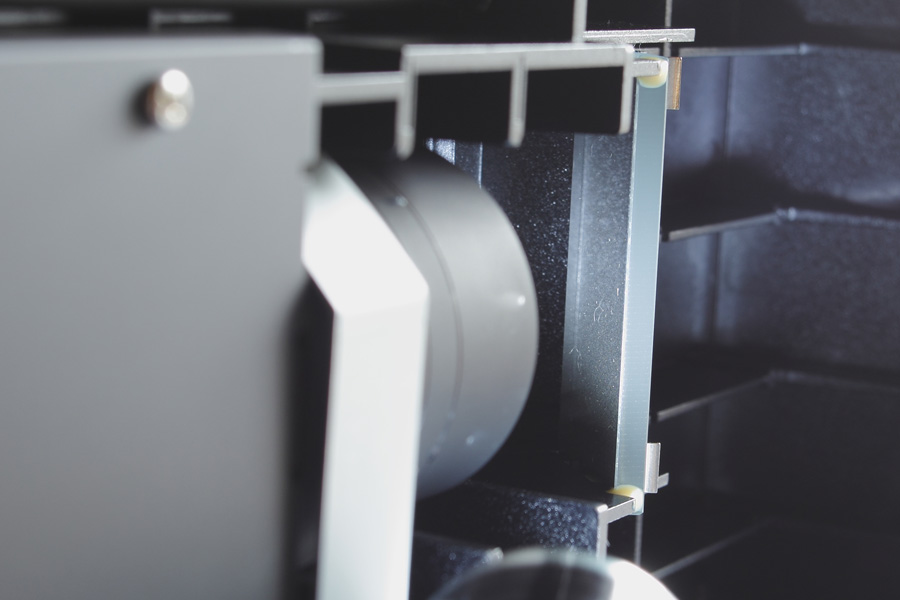
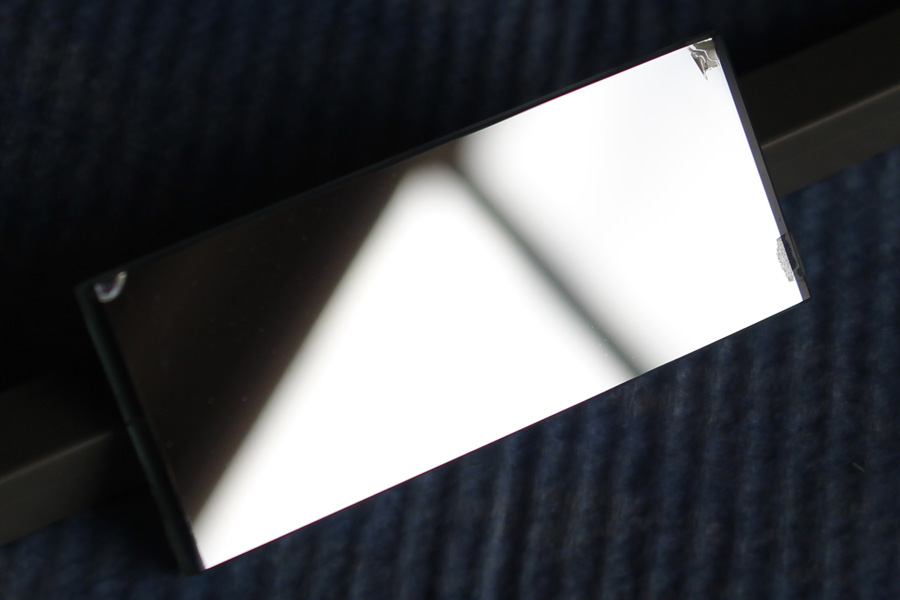
2) Turn the optical assembly on its side. You can see the mirror now. Be very careful with it. This is a first surface mirror, which means that the reflecting surface is NOT sandwiched between two layers of glass, as it is the case with most commonly used mirrors. The reflective surface in this mirror is protected by a very thin and fragile layer of coating, which can be scratched very easily by touch. So... DO NOT TOUCH the reflective surface by hand or any hard object! Doing so may permanently damage it. As you can see from the photo above, the mirror is sitting in the housing at an angle, reflective surface up and toward the lens.
3) Inspect the mirror. This one looks quite dusty - time to clean it.
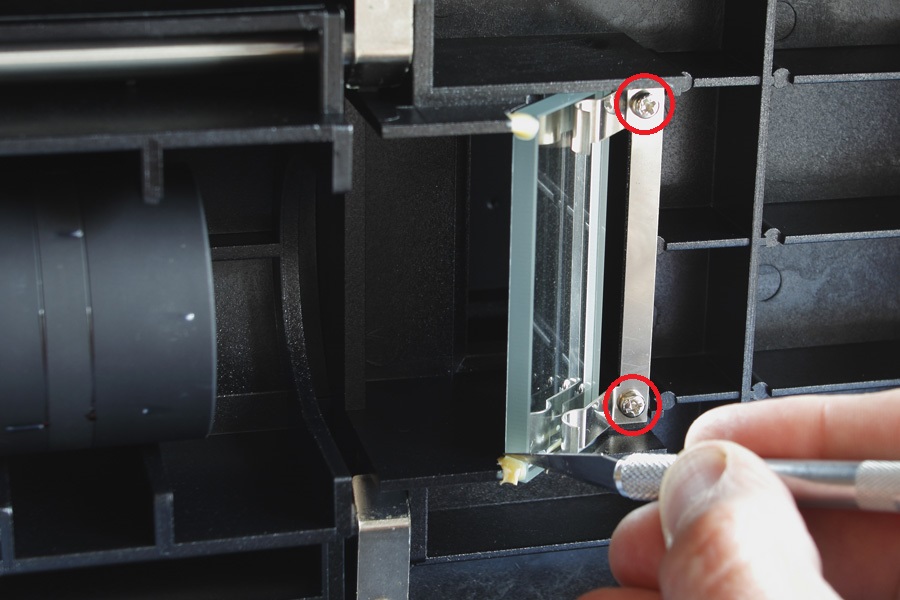
4) Scrape the soft bonding compound off with exacto knife or razor. Then remove (or just loosen the two screws) and gently remove the mirror. It is best to use latex gloves when handling this mirror!
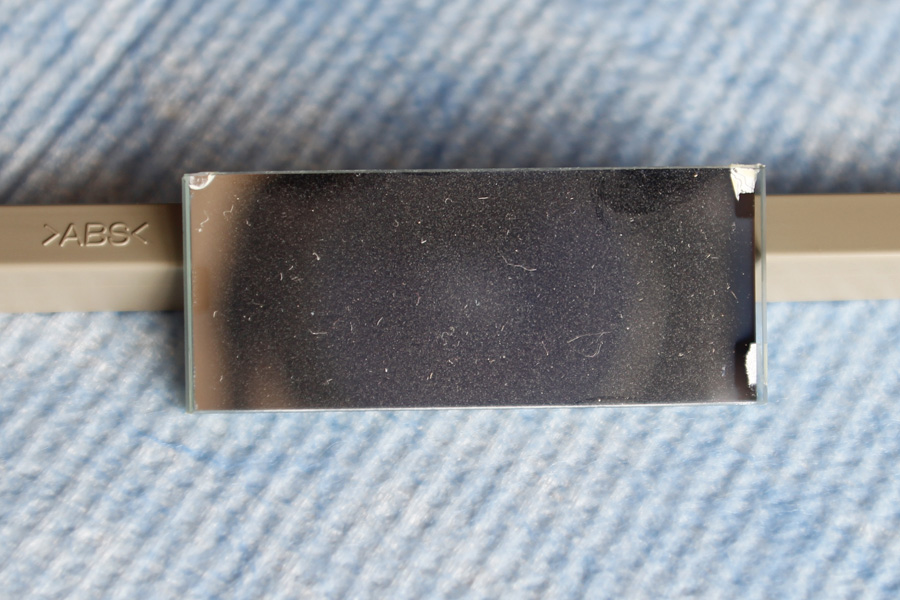
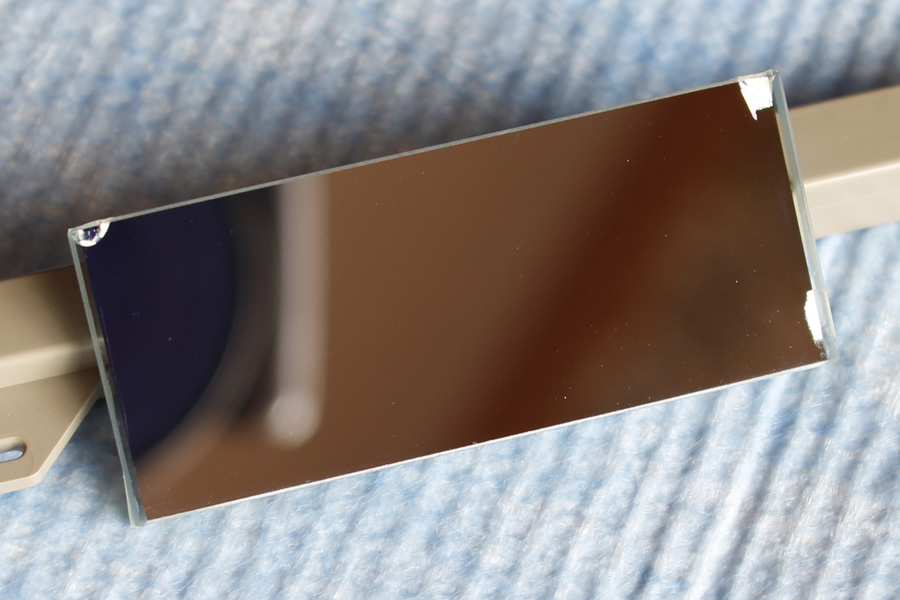
5) This is how a dirty mirror looks. This one had a lot of dust.
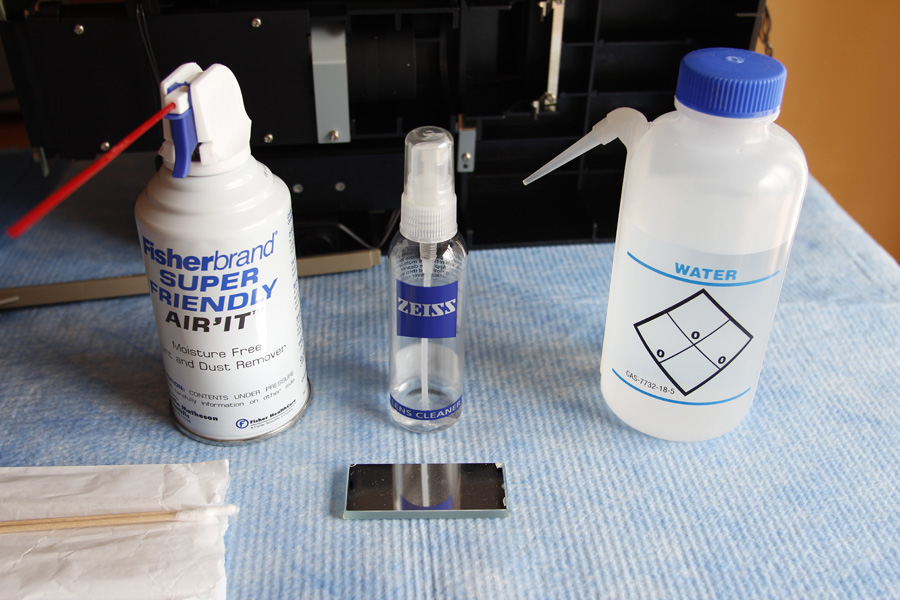
6) Clean the dirty mirror. If it is just dust - try to blow it off with a little rubber bulb - like the one sold in pharmacies for clearing the noses of the babies. If that does not work - use lens cleaning solution followed by DI water rinse. I really like Zeiss Lens Cleaning fluid (I do not work for Zeiss :)) - it has some alcohol and some detergent. Spay it generously on the reflective surface and then rinse with DI water and then blow-dry with the baby bulb. It may take quite a few times to get the mirror clean. Some people recommend using a mild detergent in ultrasonic bath - I am sure that works even faster. Most importantly - make sure you do not touch the reflective surface with your hands or anything hard. I think it is OK, if nothing else works, to drag very wet (with Zeiss cleaner liquid) sheet of lens cleaning paper against the reflecting surface, which was also first generously sprayed with the same Zeiss fluid. But I know some people would strongly disagree. I think you can do it, but you have to be extremely careful.
7) This is how clean mirror looks. It is hard to show - as you would expect if it is clean you do not see much :). No dust, streaks or rainbow shades. Now you can put the mirror back into the housing. Take your time with this step too!
In the case you have a mirror degraded by fungus, (or you messed up and scratched the mirror while cleaning :), you can order a replacement (you will need a mirror with dimensions 70mm x 29mm x 5mm, but I think 70mm x 29mm x 6mm will work as well) here (I have no agreements with this vendor):
http://firstsurfacemirror.com/
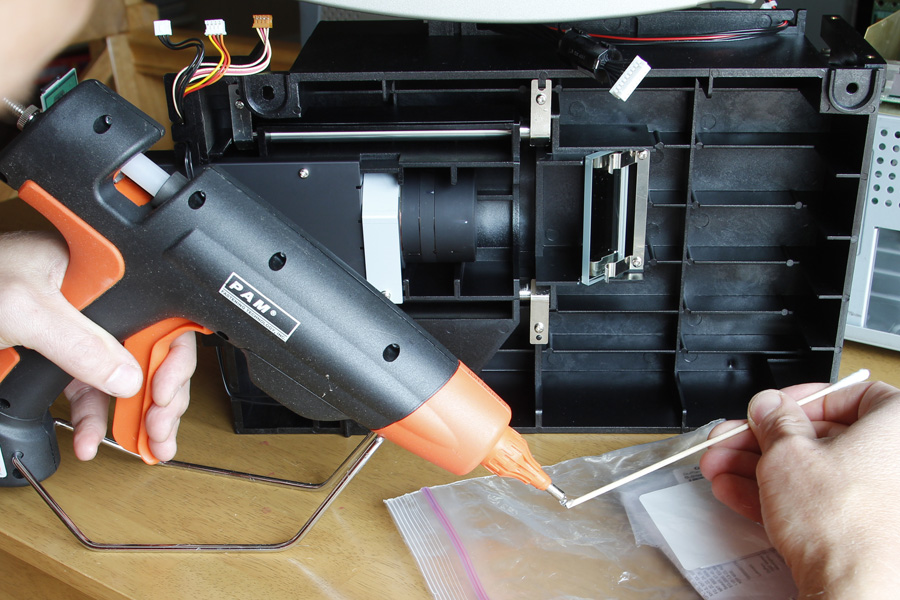
8) Put the mirror back in place. Tighten the two screws holding the bracket pushing the mirror in place. I am not sure what that soft bonding compound (that you scraped with exacto knife) was. I use a glue gun.
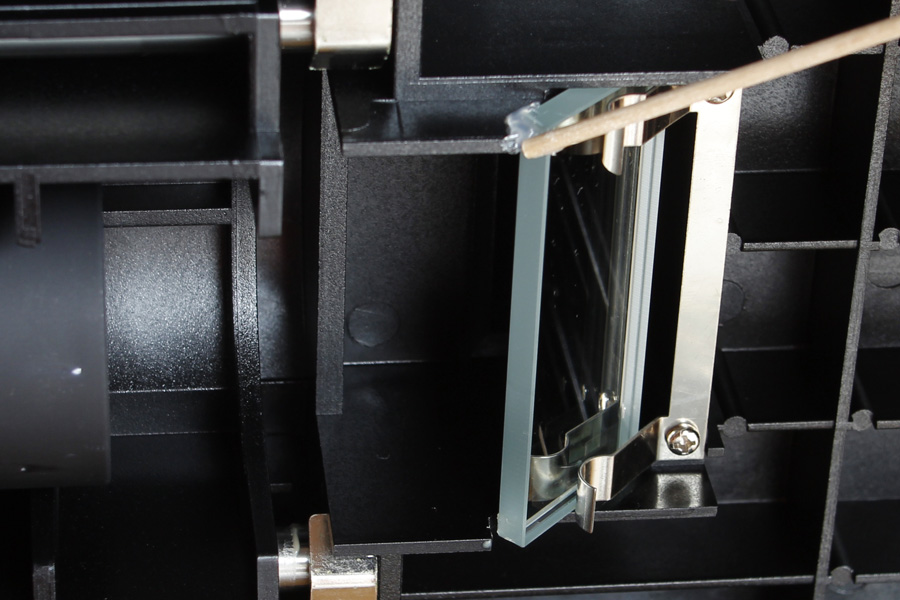
9) I use intermediate step of a wood stick - squirt some hot glue on it first and then apply it as it cools down. Once this is done, finish re-assembly in the reverse order. Good luck!