![]()
![]()
![]()
![]()
Replacement of the shaft coupling in Nikon Super Coolscan LS-8000 and LS-9000 scanners
One of failure modes of the Nikon LS-8000 and LS-9000 scanners is a broken shaft coupling, connecting the stepper motor to the worm screw moving the film tray carriage. The symptom of this problem is a failure of initialization procedure (fast blinking power light) at very early stage - before the scanner "plays" its usual start-up music and tests LED.
This coupling is made from aluminum and plastic and sometimes fails (I suspect mostly due to rough handling during shipping). I could not find an identical coupling online, but found a very similar that works just fine. The replacement procedure is the same for LS-8000 and LS-9000 (once you took the outer shell off).
As of fall of 2015 Nikon was still service LS-9000 and as far as know they still have a stock of these couplings. But. This is a very easy repair and I think there is a greater risk of additional damage during shipment then by doing it yourselves. However - as always - you are welcome to follow my procedure - but do it at your own risk.
1) Follow the first 2 steps of
Disassembly of Nikon Super Coolscan LS-8000
or first 3 steps of
Disassembly of Nikon Super Coolscan LS-9000
- to remove the outer shell.
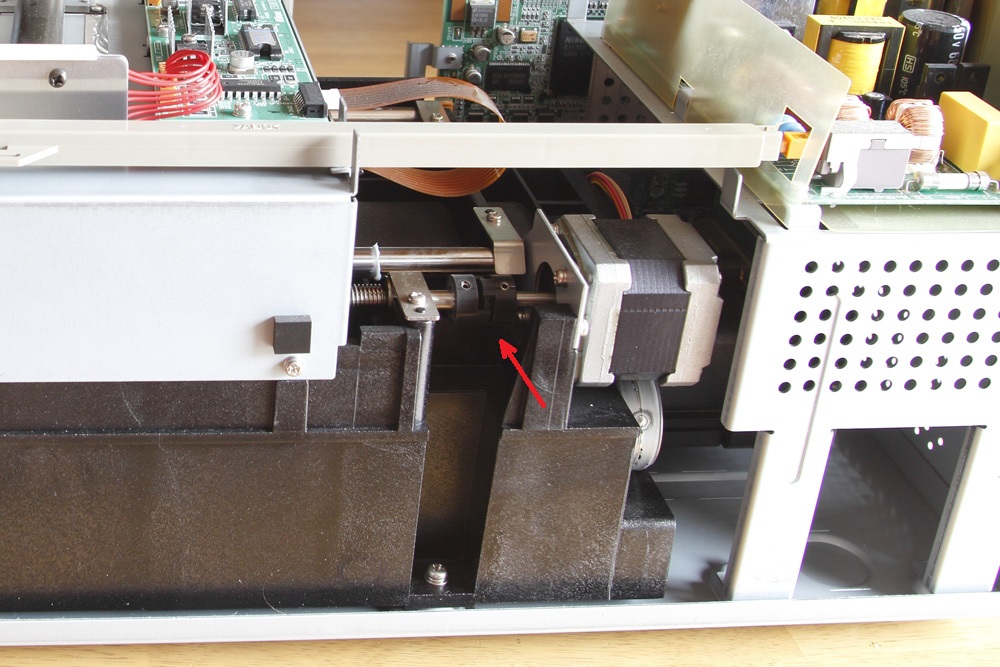
2) Red arrow above indicates the flexible shaft coupling that may be broken. If it is broken, it will need to be replaced.
3) Perform the step 5 of
Disassembly of Nikon Super Coolscan LS-8000
or step 6 of
Disassembly of Nikon Super Coolscan LS-9000
- to remove the back wall
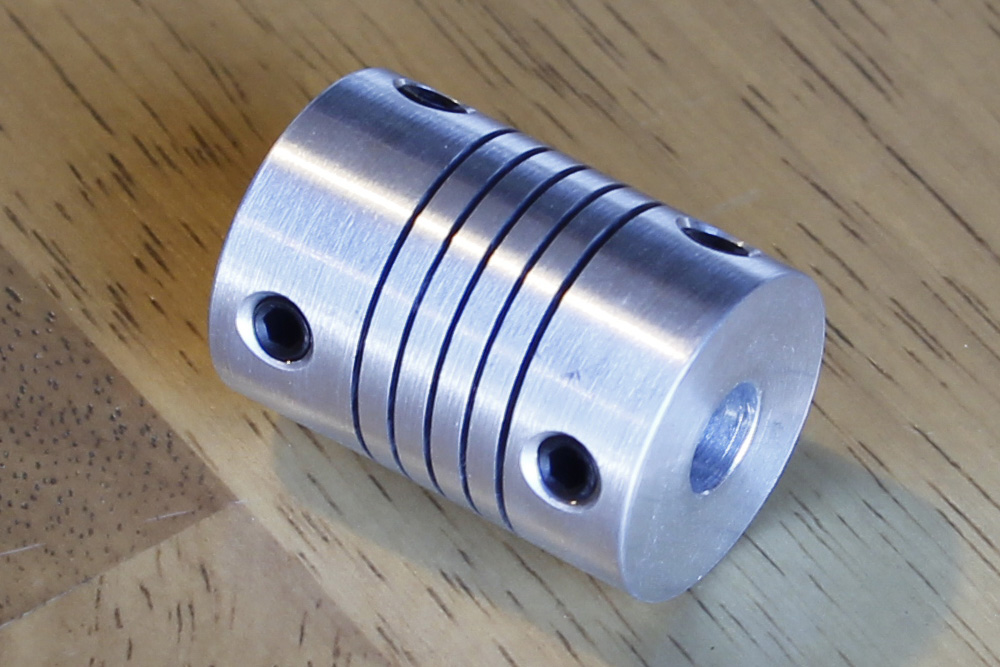
The coupling connects two shafts with diameters of 5mm (step motor, right) and 6mm (worm screw, left). Search internet for "flexible shaft coupling 5mm x 6 mm". Original coupling is 22mm long and about 17 mm outer diameter. The length and outer diameter are not super-critical. I found couplers with length of 25mm and outer diameter of 18mm (see below) and they work fine:
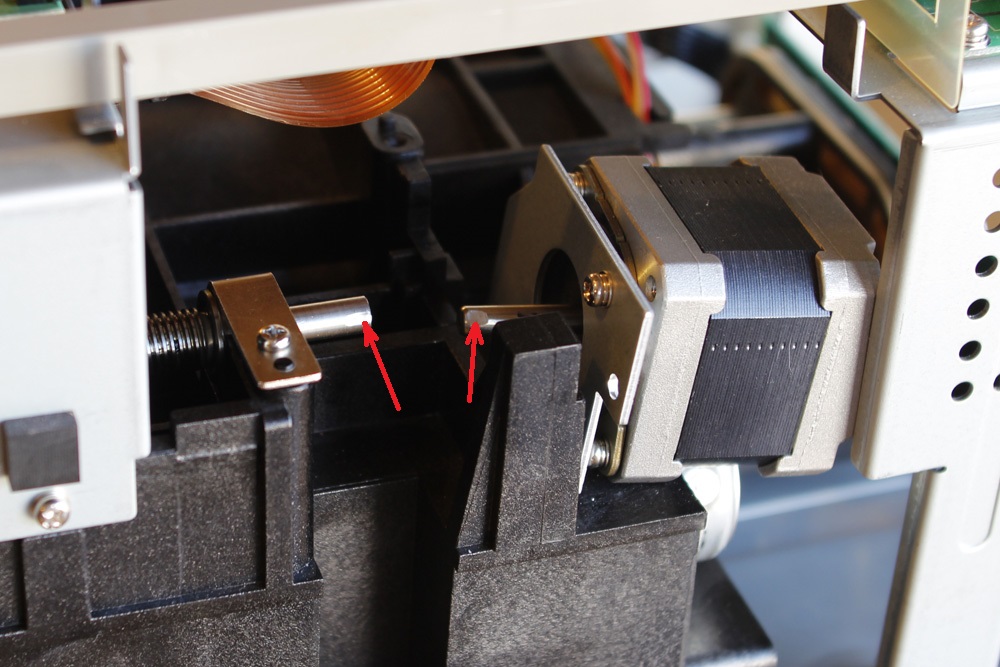
4) Remove two screws holding the bracket with the step motor (see below). By the way, it's a good time to put a drop of oil into the bearing at the back opening of this motor. I use Super Lube 51010 Oil (synthetic small bearing oil with Syncolon).
5) I used a dremel tool to grind flat faces on both shafts. I am not sure this is necessary, but if you do this - make sure you thoroughly protect the scanner optics from metal shavings and dust.
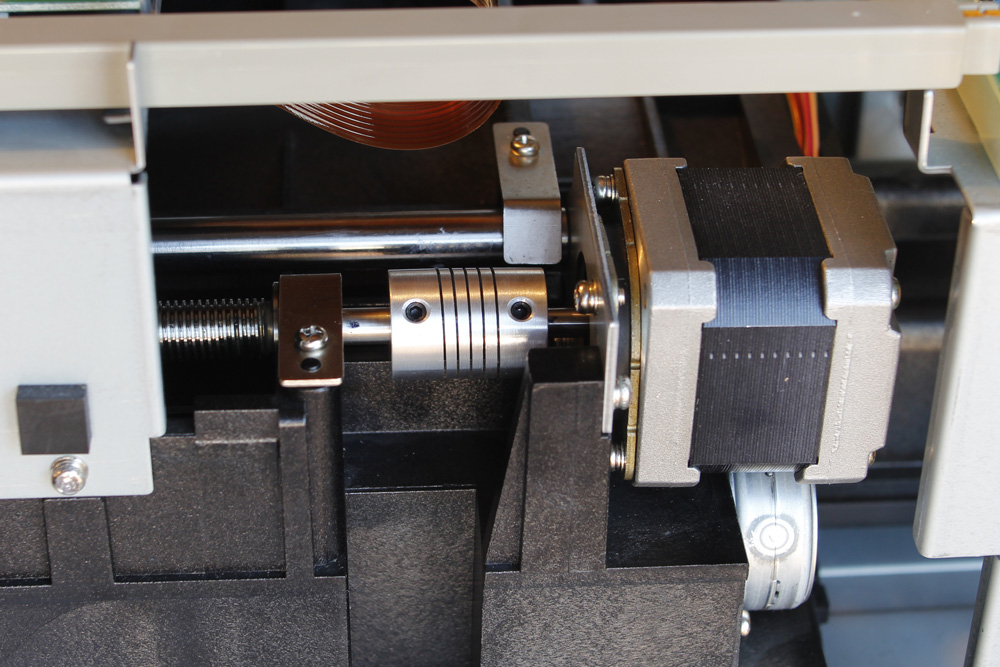
6) Mount the new coupling and re-ttach the motor.
7) Reattach the back wall and the top shell. It should work now!